If there is one thing that can make my sons quiet for a few minutes, it's these Chocolate Chip Blondie Bars. They usually ask me to make them every few weeks. Of course, I always do. I mean, seriously, who doesn't like a little chocolate now and then? Since I don't purchase store made cookies or processed snacks, I try to find the easiest recipes I can to satisfy their sweet tooth.
Showing posts with label cookies. Show all posts
Monday, October 6, 2014
Monday, August 11, 2014
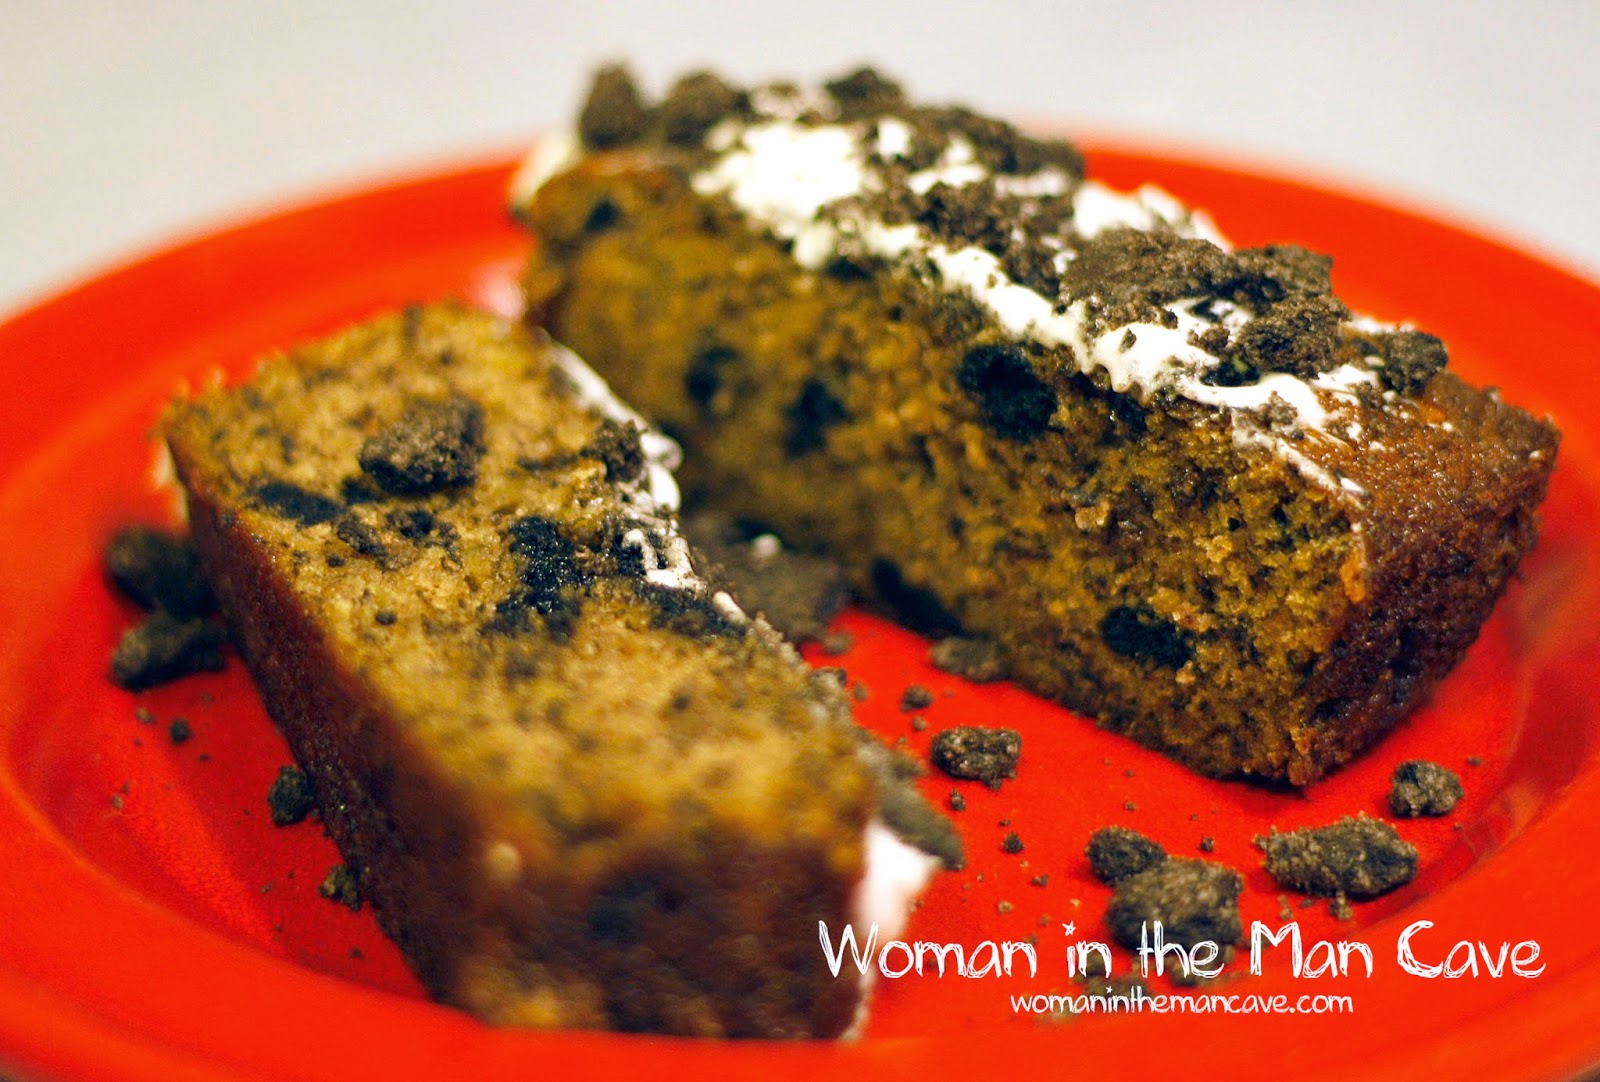
Cookies and Cream Banana Bread - Oh Yes I Did!
A girl my husband works with asked him if I'd be able to make a cookies n' cream banana bread. So, as always, I turned to Pinterest to see what I could find. I came across a recipe from allthecooks.com and decided to give it a try.
I ended up tweaking it a bit so that it packed a bit more cookie punch. Let me tell you...it's good. As you can see, my bread came out a little short and looks like a cake, but it's banana bread. I think the next time around I'm going to use my smaller pans and make the bread portion a lot thicker.
Enough talking about it, let's get to the recipe! Here you go:
Cookies and Cream Banana Bread
Makes 2 loaves
Delicious Drizzle and Topping:
Grease two 8x5 bread pans. Pour half of mixture into each pan. Crush a few more Oreos and sprinkle on top of each loaf before cooking. Press gently on the crushed cookies so it sticks to your batter.(You can use different sizes of pans, you'll just have to adjust your baking time. Just keep an eye on them and pull them when a toothpick inserted in the center of the bread comes out clean.)
Bake for 35-45 minutes depending on how hot your oven gets. (I have an oven thermometer in mine so I know exactly what temp the inside of my oven is. Mine runs ten to fifteen degrees lower than the temp I set it at, so I have to compensate by adding a little more heat. You can get a thermometer that hangs inside your oven on Amazon for real cheap.)
You'll know your bread is done when the top is browned and a toothpick inserted in the middle comes out clean. Let cool in pans for fifteen minutes then remove from pans and place on cooling rack. Let cool completely.
Once the bread is cooled prepare the drizzle topping. More cream for a runnier drizzle and less cream for a thicker drizzle. It's your choice. Mix the cream and powdered sugar together and drizzle some on each loaf. Sprinkle a bit more crushed Oreo on top of the drizzle and then drizzle some more. (Seriously, how many times can I say drizzle?)
You're all done. Slice a piece off and enjoy.
----------------------------
Well, that's it. I know it's not the healthiest bread on Earth. I wasn't going for healthy (hey, it has banana in it though). You'll have to let me know if you have another banana bread recipe you think I'd like. I'd love to try it.
Well, that's it for now. I hope you have a great day and a good time making this bread. As always, thanks for reading.
Take care,
NB
I ended up tweaking it a bit so that it packed a bit more cookie punch. Let me tell you...it's good. As you can see, my bread came out a little short and looks like a cake, but it's banana bread. I think the next time around I'm going to use my smaller pans and make the bread portion a lot thicker.
Enough talking about it, let's get to the recipe! Here you go:
Cookies and Cream Banana Bread
Makes 2 loaves
- 4 medium · slightly overripe bananas - not too ripe or the bread will be runny. You can add more flour if it seems a bit too runny, but it's easier to use the right kind of bananas.
- ¾ cup · butter (room temp)
- 1 cup · sugar
- 2 · eggs
- 1 teaspoon · vanilla extract
- 1 ½ teaspoon · baking soda
- ¼ teaspoon · salt
- ½ teaspoon · ground cinnamon
- 1 cup · crushed Oreos - Or more if you like lots o' Oreos ;)
- 1 1/4 cup · all purpose flour
Delicious Drizzle and Topping:
- 1 cup · powdered sugar
- 5 · -6 tbl. heavy whipping cream
- 1/2 cup crushed Oreo
Grease two 8x5 bread pans. Pour half of mixture into each pan. Crush a few more Oreos and sprinkle on top of each loaf before cooking. Press gently on the crushed cookies so it sticks to your batter.(You can use different sizes of pans, you'll just have to adjust your baking time. Just keep an eye on them and pull them when a toothpick inserted in the center of the bread comes out clean.)Bake for 35-45 minutes depending on how hot your oven gets. (I have an oven thermometer in mine so I know exactly what temp the inside of my oven is. Mine runs ten to fifteen degrees lower than the temp I set it at, so I have to compensate by adding a little more heat. You can get a thermometer that hangs inside your oven on Amazon for real cheap.)
You'll know your bread is done when the top is browned and a toothpick inserted in the middle comes out clean. Let cool in pans for fifteen minutes then remove from pans and place on cooling rack. Let cool completely.
Once the bread is cooled prepare the drizzle topping. More cream for a runnier drizzle and less cream for a thicker drizzle. It's your choice. Mix the cream and powdered sugar together and drizzle some on each loaf. Sprinkle a bit more crushed Oreo on top of the drizzle and then drizzle some more. (Seriously, how many times can I say drizzle?)
You're all done. Slice a piece off and enjoy.
----------------------------
Well, that's it. I know it's not the healthiest bread on Earth. I wasn't going for healthy (hey, it has banana in it though). You'll have to let me know if you have another banana bread recipe you think I'd like. I'd love to try it.
Well, that's it for now. I hope you have a great day and a good time making this bread. As always, thanks for reading.
Take care,
NB
Wednesday, May 7, 2014
100 Days of Pinterest: Day 22 - Texas Sheet Cake Cookies Recipe
![]() |
Okay, I know I already posted today. I just couldn't wait to share this Pin though. My friend shared the idea on Facebook and I immediately went to Pinterest to see if it had been Pinned, and it had. I am still going to make the No Grate Homemade Laundry Soap tonight. |
For Day 22, my friend Dana brought to my attention a heavenly little cookie that just begged to be made in my house. The cookies are called Texas Sheet Cake Cookies and they were a recipe Pinned from cookiesandcups.com. I decided to make these on a whim and thankfully, I had all of the ingredients readily available. That's the benefit of being a chubby girl, there's always something available for cookie recipes in my home.
Now, I don't know about you, but I love Texas Sheet Cake. My grandma used to make it for my birthday every year. It is one of my all time favorites. She has Alzheimer's, so a lot of the recipes she used to make so amazingly, in her own special way, are gone. I miss her vegetable soup. To this day I've never tasted one as good as hers. So, I guess you could say these cookies are a tribute to my grandma. When I was making them I thought of her. These are another simple recipe to make. I don't have a stand mixer, so I just used my regular old hand mixer and it did the job just fine. The next time I go to make these, I'm going to have my oldest son make them instead. He said he wanted to be a chef and what better recipe than Texas Sheet Cake Cookies?
When I first pulled these little pieces of heaven from the oven my son immediately asked if he could have one. I made him wait until they cooled for a few minutes, but I gave in. They weren't iced yet, but he loved them. He asked if I could make them for his birthday. Once they were iced, the cookie assault began. There was no waiting for them to set. Matter of fact, as you can see by my pics I didn't wait for the icing to completely cool to shoot pics of them. I was afraid they wouldn't last long!
If you're looking for a unique and absolutely delicious cookie to make, this is it. Don't look any further. Get the stuff out and make it. You won't be sorry you did!
Here's the recipe from Cookies and Cups website to save you the time of looking for it:
Texas Sheet Cake Cookies
Ingredients
- 1/2 cup butter, room temperature
- 1/3 cup granulated sugar
- 1 egg
- 1 tsp vanilla
- 1 tsp baking powder
- 1/2 tsp salt
- 1 1/3 cup flour
- 1/2 cup semi-sweet chocolate chips, melted
- 1/2 cup butter
- 2 Tbsp cocoa powder
- 3 Tbsp milk
- 2 1/2 cups powdered sugar
Cookies
Icing
How to Make
- Preheat oven to 350°
- Line baking sheet with parchment or silicone mat, set aside.
- In bowl of stand mixer beat butter and sugar together until light, scraping sides frequently.
- Add in egg and vanilla and continue mixing until incorporated. Mix in baking powder and salt.
- Turn mixer to low and slowly add in flour. Dough will be thick.
- In a microwave safe bowl heat chocolate chips on high in 30 second increments until melted, stirring after every 30 seconds.
- Mix melted chocolate directly into cookie dough until evenly mixed.
- Drop dough by a measured tablespoon sized mounds onto baking sheet. Bake for 7-8 minutes until cookies just appear set. They will still be very soft on the inside. DO NOT overbake!!
- Transfer to a wire rack to cool.
- In a medium saucepan combine butter, cocoa powder and milk over medium heat, whisking until melted together. Remove from heat and whisk in powdered sugar.
- Pour icing over cookies and allow icing to set before serving.
Cookies
Icing
Notes
store at room temperature for up to 3 days.
*Make sure not to overbake these cookies. The insides will remain soft and dense if baked correctly.
Enjoy!
NB
Friday, April 25, 2014
100 Days of Pinterest: Days 8 through 10 - Peanut Butter No-Bake Crispy Clusters
I haven't posted for a few days, but I have been staying busy with my Pinterest challenge. So, I'm going post all three days worth of attempts. Starting with some Homemade Lavender Orange All-Purpose Cleaner.
DAY 8: Now, this stuff has vinegar as a base. No matter how much orange and lavender you put into this concoction, you can't completely eliminate that vinegar smell. It was certainly a lot tamer than straight vinegar and it certainly cleans things up really well. This recipe takes five to seven days to brew. So I put it all together last weekend. I strained the mixture on Wednesday and added it to a spray bottle. I used it to clean the bathroom and it did a really good job. Definitely a better choice than the bleach cleaners.
After making the cleaner I decided to make some Peanut Butter No Bake Crispy Clusters. These were super easy to make and tasted really good. Now, I opted to use the corn syrup instead of the maple syrup. I am not a big fan of maple syrup on anything other than my pancakes, eggs, or sausage. You have to be careful to simmer the mixture or else you will have a hard taffy-like coating on these suckers. If you simmer it correctly they come out tasting similar to caramel. They are excellent!! I used Chocolate Toast Crunch for half the batch and Rice Krispies for the rest. Good stuff!!

DAY 9: For day 9, I went with the Double Crunch Honey Garlic Chicken Breasts. The first image is the dredge that is used to coat the chicken. This had a lot of different herbs. As the instructions stated, this makes a large amount of coating. So, I split the mixture in half and placed the excess half into the freezer for a later batch (which I will certainly be making). My husband and I both agree the final product was reminiscent of General Tso's chicken with a kick. It was really good! Kind of sweet with a little bit of heat. The honey garlic sauce was amazing and added a little sweetness to the overall flavor. With this many herbs on board, it helps to balance out the flavor. Definitely a good recipe!
After dinner I decided to decorate the grapevine wreath I purchased at a garage sale for fifty cents. I purchased a roll of burlap from the craft store and made a few of the Burlap Flower Rosettes. I really sucked at making these my first few attempts, but I eventually got it. They turned out pretty nice (thank goodness I found a hot glue gun at that garage sale too). Once I get a few more things for my wreath, I'll add a final pic of it.
DAY 10: For today's project I went with a few easy ones. As you can see I tried the Jolly Rancher Suckers. These were super easy and relatively cheap. I did as the instructions stated. I placed them in the oven on a cookie sheet with some parchment paper at 200 degrees for five minutes. However, this is where the Pinterest instructions failed. After the first five minutes, pull the tray out and use a sucker stick (which you can buy at Walmart in the craft department) to press down into the softened Jolly Ranchers.
Then, place them back in the oven for three to five more minutes. After this additional time is up, pull them out and press down on the sucker stick to flatten the Jolly Ranchers even more. As you are pushing the stick down, slowly begin to twist the stick. This will help coat it in the softened Jolly Rancher. Then, let the suckers cool for about thirty minutes. The boys loved them. It was interesting mixing the flavors. I made Myles an apple-cinnamon one and he loved it! These are a win in my book!
After a batch of suckers were done, I decided to make dinner. I made the Sausage and Cheesy Potatoes recipe. I couldn't find the steakhouse seasoned potatoes like the recipe called for, so I used some plain home fries and added a little salt, pepper, and hickory smoke salt to the mix. This was a fast, easy, and really delicious meal. The serving dish was empty after it was all said and done.
Since my husband has joined the magical land of Pinterest, I found some green Solo-type cups at the store for only a dollar (they are the reusable type) for him to decorate Minecraft style for the boys. Since they are both Minecraft nerds I found some neat Pins to try in their rooms. Including one that called for decorating green cups with the Creeper face. My husband did them free-hand, because he's awesome like that. Had I tried to do this it would have resembled a black hole with some weird squiggly lines, not pretty! I'm not an artist by any means. The boys thought these were the coolest thing ever. I'm not sure if the Sharpie will wash off, but if it does I know my husband will be able to reproduce the Creeper on these cups for my little men.
To finish the evening off, I decided to make some Chocolate Swirl Banana Bread. This recipe was super easy and smelled wonderful cooking. It hasn't cooled completely, so I haven't been able to get the family's reviews of how it tastes yet. However, since I have a problem waiting I tried a little piece and it was probably the best tasting banana bread I've ever had. The chocolate made it so much better! Chocolate makes everything better though. I think my days of boxed banana bread mix are something of the past. This stuff is amazing. You simply must try it.
Well, I think that's it for today. I'm not sure what I'm doing tomorrow. I have a few things in mind, but it all depends on the weather. Oh, and if my dog can keep his mouth off of my spray paint. Yes, my dog was a bit curious about the spray paint can I left sitting on the grill and he decided to be a putz and knock it down when I wasn't looking. All I heard was a loud hissing sound and I saw my dog take off running. Needless to say, I was only able to start one tiny part of my project that day. Another trip to Lowe's I guess. Silly dog.
Thanks for reading and I'll see you again tomorrow.
Take care!
NB
DAY 8: Now, this stuff has vinegar as a base. No matter how much orange and lavender you put into this concoction, you can't completely eliminate that vinegar smell. It was certainly a lot tamer than straight vinegar and it certainly cleans things up really well. This recipe takes five to seven days to brew. So I put it all together last weekend. I strained the mixture on Wednesday and added it to a spray bottle. I used it to clean the bathroom and it did a really good job. Definitely a better choice than the bleach cleaners.
After making the cleaner I decided to make some Peanut Butter No Bake Crispy Clusters. These were super easy to make and tasted really good. Now, I opted to use the corn syrup instead of the maple syrup. I am not a big fan of maple syrup on anything other than my pancakes, eggs, or sausage. You have to be careful to simmer the mixture or else you will have a hard taffy-like coating on these suckers. If you simmer it correctly they come out tasting similar to caramel. They are excellent!! I used Chocolate Toast Crunch for half the batch and Rice Krispies for the rest. Good stuff!!

DAY 9: For day 9, I went with the Double Crunch Honey Garlic Chicken Breasts. The first image is the dredge that is used to coat the chicken. This had a lot of different herbs. As the instructions stated, this makes a large amount of coating. So, I split the mixture in half and placed the excess half into the freezer for a later batch (which I will certainly be making). My husband and I both agree the final product was reminiscent of General Tso's chicken with a kick. It was really good! Kind of sweet with a little bit of heat. The honey garlic sauce was amazing and added a little sweetness to the overall flavor. With this many herbs on board, it helps to balance out the flavor. Definitely a good recipe!After dinner I decided to decorate the grapevine wreath I purchased at a garage sale for fifty cents. I purchased a roll of burlap from the craft store and made a few of the Burlap Flower Rosettes. I really sucked at making these my first few attempts, but I eventually got it. They turned out pretty nice (thank goodness I found a hot glue gun at that garage sale too). Once I get a few more things for my wreath, I'll add a final pic of it.
DAY 10: For today's project I went with a few easy ones. As you can see I tried the Jolly Rancher Suckers. These were super easy and relatively cheap. I did as the instructions stated. I placed them in the oven on a cookie sheet with some parchment paper at 200 degrees for five minutes. However, this is where the Pinterest instructions failed. After the first five minutes, pull the tray out and use a sucker stick (which you can buy at Walmart in the craft department) to press down into the softened Jolly Ranchers.
Then, place them back in the oven for three to five more minutes. After this additional time is up, pull them out and press down on the sucker stick to flatten the Jolly Ranchers even more. As you are pushing the stick down, slowly begin to twist the stick. This will help coat it in the softened Jolly Rancher. Then, let the suckers cool for about thirty minutes. The boys loved them. It was interesting mixing the flavors. I made Myles an apple-cinnamon one and he loved it! These are a win in my book!
After a batch of suckers were done, I decided to make dinner. I made the Sausage and Cheesy Potatoes recipe. I couldn't find the steakhouse seasoned potatoes like the recipe called for, so I used some plain home fries and added a little salt, pepper, and hickory smoke salt to the mix. This was a fast, easy, and really delicious meal. The serving dish was empty after it was all said and done.
Since my husband has joined the magical land of Pinterest, I found some green Solo-type cups at the store for only a dollar (they are the reusable type) for him to decorate Minecraft style for the boys. Since they are both Minecraft nerds I found some neat Pins to try in their rooms. Including one that called for decorating green cups with the Creeper face. My husband did them free-hand, because he's awesome like that. Had I tried to do this it would have resembled a black hole with some weird squiggly lines, not pretty! I'm not an artist by any means. The boys thought these were the coolest thing ever. I'm not sure if the Sharpie will wash off, but if it does I know my husband will be able to reproduce the Creeper on these cups for my little men.
To finish the evening off, I decided to make some Chocolate Swirl Banana Bread. This recipe was super easy and smelled wonderful cooking. It hasn't cooled completely, so I haven't been able to get the family's reviews of how it tastes yet. However, since I have a problem waiting I tried a little piece and it was probably the best tasting banana bread I've ever had. The chocolate made it so much better! Chocolate makes everything better though. I think my days of boxed banana bread mix are something of the past. This stuff is amazing. You simply must try it.![]() |
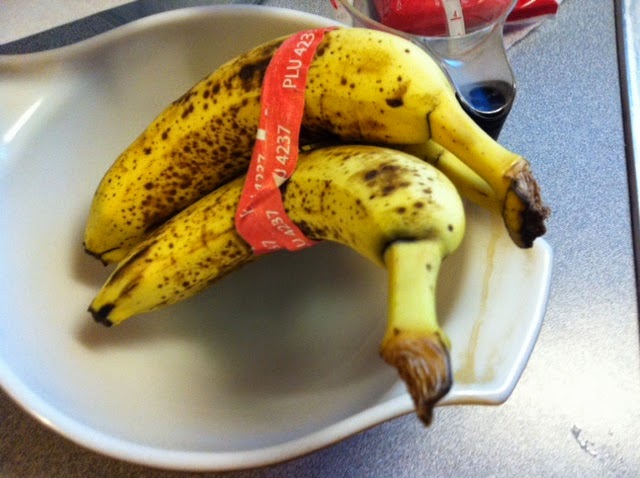
| Older, spotted bananas are cheaper to purchase if you don't have any on hand. |
![]() |
| Getting the swirl on! |
Thanks for reading and I'll see you again tomorrow.
Take care!
NB
Subscribe to:
Posts (Atom)