Showing posts with label peanut butter. Show all posts
Showing posts with label peanut butter. Show all posts
Thursday, March 12, 2015
Girl Scout Cookies and Pie


I grew up in a single family home. We didn't have two pennies to our name, but we always had a jar of peanut butter in the cabinet. It was something cheap that provided protein and I can remember going in to the kitchen for a snack and getting a scoop of peanut butter with some crackers. After years of eating it, you'd think I wouldn't want anything to do with it. That's not true at all. To this day I always keep a jar in my cabinet. It's my go-to snack in a pinch. When it came time to make this Baked Peanut Butter Pie I knew it would be a hit in my home.
Wednesday, June 4, 2014
100 Days of Pinterest: Day 48 - Peanut Butter Dog Bones Recipe
I am almost halfway to my 100 day challenge. I think this challenge has really helped me refocus my thoughts away from MS. I now find myself thinking about how things would make good Pinterest challenges. It's good to find something to take your mind off of things sometimes. Not necessarily to push things under the rug, but to overcome.
Since summer is in the air, I've been looking for a lot of summery ideas to try. The other day I tried the recipe for the Jello Pudding Pops. The pudding pops tasted more like a Wendy's Frosty than what I remembered Pudding Pops tasting like. Which isn't a bad thing. Wendy's is my favorite fast food restaurant (okay, other than Taco Bell) and I love Frosty's! I think I seriously need to find better Popsicle trays though. It was a complete pain in the butt getting the pudding pops out of the dollar store Popsicle forms I have. I ended up submerging them in warm water a couple of times before I was able to get them out. Then they were a bit melted.

One of the other Pins I attempted were the Peanut Butter Dog Bones. Now, I should seriously buy stock in peanut butter. My sons, mostly my youngest one, could eat peanut butter every single day if I'd let them. We could be flat broke, but we'd have peanut butter in our cabinet. I usually have to buy the bulk sized Jif to keep my family supplied. I had my oldest son help make these. He said he wanted to be a chef someday so here's his start. Dog bones. He can't go wrong. The ingredients were minimal and I liked that I know what my dog is eating. We buy the boxed dog treats every couple of weeks and I have no idea how they are made or what they are made with. I don't know about your dog, but my dog couldn't care less if he received neat dog bone shaped treats after he does his business in the yard. I have a pug and a pit bull-American bulldog mix, so I had to make different sized treats. So, I simply rolled the dough out and then just cut different sized rows so I could get smaller and larger sized treats. Easy peasy. Once these things were done both of my furry little boys were sitting in the kitchen waiting for a treat. My pug is quite picky and he kept sitting there with his puggy eyes begging me for more. They love these things.
Peanut Butter Dog Bones Recipe
Originally posted on: Arch.
-------------------------------------------------------------
 Today I tried the Homemade Bread Pin. I like to torture my family by making as many bread recipes as I can. I figure eventually I'll find that one recipe that keeps us coming back. This recipe made four loaves of bread and since I really don't need that much bread I used some to make homemade cinnamon rolls. I rolled the dough out, buttered it, and sprinkled a heavy dose of sugar and cinnamon on the flattened out dough.Then I rolled it up and cut it into half inch cinnamon rolls. I put them in a greased pan, snug in a cinnamon roll cluster and stuck them in the oven for eighteen minutes at 375 degrees (golden brown). When they were done I whipped up some icing with milk, powdered sugar, and a splash of vanilla. These didn't last but ten minutes once they were done. My boys and the neighbor boy ate most of them, leaving only a few for me and my husband.
Now, the bread recipe had WAY too much salt in it for my liking. If you aren't a salt fiend then you may want to reduce the salt used in this recipe. To date, I think the Kitchen-Aid bread recipe is by far the best one I've tried so far. What's your favorite bread recipe? My family loves bread and I'd like to try some different ones. Send me your recipes as womaninthemancave@yahoo.com and I'll try them out.
Through this challenge I have discovered that I am a foodie. I'd love to say that I eat healthy, low fat, all organic foods, but I don't (yet). I make meals and desserts that I know my guys will enjoy. Not only does it help to mix things up, but it also encourages my sons to try things they haven't tried yet in hopes that they will find a new food to call their favorite. It's working, because while taking part in this challenge I have started eliminating processed foods from my home. I think that is one of the biggest challenges to face these days with so many instant delights at our fingertips. Why make cookies when you can buy a pack already made? Why make homemade jam when you can buy a jar off the shelf? Well, simply put, because you know where it came from. You don't know who handled the berries they used before they used them in your jam. Did they wash them first? Were there heavy pesticides used to keep the bugs off? Who knows?
I think the first step in eating better is by eliminating easy and that's one of the successful aspects of the Pinterest challenge. I'm making more of the the items we'd run to the store and buy. No more preservatives or pesticides in my sons. So, I guess this is going pretty well. I'm almost halfway there and I can't wait to see what the rest of my Pinterest challenge brings.
As always, find me on Pinterest at: http://www.pinterest.com/inthemancave/
Or Facebook: https://www.facebook.com/womaninthemancave
Or Twitter: @NmsBauer
Thanks for reading.
Take care.
NB
Since summer is in the air, I've been looking for a lot of summery ideas to try. The other day I tried the recipe for the Jello Pudding Pops. The pudding pops tasted more like a Wendy's Frosty than what I remembered Pudding Pops tasting like. Which isn't a bad thing. Wendy's is my favorite fast food restaurant (okay, other than Taco Bell) and I love Frosty's! I think I seriously need to find better Popsicle trays though. It was a complete pain in the butt getting the pudding pops out of the dollar store Popsicle forms I have. I ended up submerging them in warm water a couple of times before I was able to get them out. Then they were a bit melted.
One of the other Pins I attempted were the Peanut Butter Dog Bones. Now, I should seriously buy stock in peanut butter. My sons, mostly my youngest one, could eat peanut butter every single day if I'd let them. We could be flat broke, but we'd have peanut butter in our cabinet. I usually have to buy the bulk sized Jif to keep my family supplied. I had my oldest son help make these. He said he wanted to be a chef someday so here's his start. Dog bones. He can't go wrong. The ingredients were minimal and I liked that I know what my dog is eating. We buy the boxed dog treats every couple of weeks and I have no idea how they are made or what they are made with. I don't know about your dog, but my dog couldn't care less if he received neat dog bone shaped treats after he does his business in the yard. I have a pug and a pit bull-American bulldog mix, so I had to make different sized treats. So, I simply rolled the dough out and then just cut different sized rows so I could get smaller and larger sized treats. Easy peasy. Once these things were done both of my furry little boys were sitting in the kitchen waiting for a treat. My pug is quite picky and he kept sitting there with his puggy eyes begging me for more. They love these things.
Peanut Butter Dog Bones Recipe
Originally posted on: Arch.
INGREDIENTS
- 2 C. whole wheat flour
- 1 Tbsp. baking powder
- 1 C. natural peanut butter (or regular)
- 1 C. skim milk (I used raw milk, that worked too)
- Cookie cutters (or not, my boys didn't mind their treat squares)
INSTRUCTIONS
Preheat oven to 375°. In one bowl, combine flour and baking powder. In
another bowl, mix peanut butter and milk. Combine mixtures and stir
well.
Drop dough on lightly floured surface and knead. Roll out dough anywhere
from 1/8” to 1/4” thick. Cut into desired shapes. Bake on greased
baking sheet for 20 minutes.
-------------------------------------------------------------
Today I tried the Homemade Bread Pin. I like to torture my family by making as many bread recipes as I can. I figure eventually I'll find that one recipe that keeps us coming back. This recipe made four loaves of bread and since I really don't need that much bread I used some to make homemade cinnamon rolls. I rolled the dough out, buttered it, and sprinkled a heavy dose of sugar and cinnamon on the flattened out dough.Then I rolled it up and cut it into half inch cinnamon rolls. I put them in a greased pan, snug in a cinnamon roll cluster and stuck them in the oven for eighteen minutes at 375 degrees (golden brown). When they were done I whipped up some icing with milk, powdered sugar, and a splash of vanilla. These didn't last but ten minutes once they were done. My boys and the neighbor boy ate most of them, leaving only a few for me and my husband.Now, the bread recipe had WAY too much salt in it for my liking. If you aren't a salt fiend then you may want to reduce the salt used in this recipe. To date, I think the Kitchen-Aid bread recipe is by far the best one I've tried so far. What's your favorite bread recipe? My family loves bread and I'd like to try some different ones. Send me your recipes as womaninthemancave@yahoo.com and I'll try them out.
Through this challenge I have discovered that I am a foodie. I'd love to say that I eat healthy, low fat, all organic foods, but I don't (yet). I make meals and desserts that I know my guys will enjoy. Not only does it help to mix things up, but it also encourages my sons to try things they haven't tried yet in hopes that they will find a new food to call their favorite. It's working, because while taking part in this challenge I have started eliminating processed foods from my home. I think that is one of the biggest challenges to face these days with so many instant delights at our fingertips. Why make cookies when you can buy a pack already made? Why make homemade jam when you can buy a jar off the shelf? Well, simply put, because you know where it came from. You don't know who handled the berries they used before they used them in your jam. Did they wash them first? Were there heavy pesticides used to keep the bugs off? Who knows?
I think the first step in eating better is by eliminating easy and that's one of the successful aspects of the Pinterest challenge. I'm making more of the the items we'd run to the store and buy. No more preservatives or pesticides in my sons. So, I guess this is going pretty well. I'm almost halfway there and I can't wait to see what the rest of my Pinterest challenge brings.
As always, find me on Pinterest at: http://www.pinterest.com/inthemancave/
Or Facebook: https://www.facebook.com/womaninthemancave
Or Twitter: @NmsBauer
Thanks for reading.
Take care.
NB
Friday, April 25, 2014
100 Days of Pinterest: Days 8 through 10 - Peanut Butter No-Bake Crispy Clusters
I haven't posted for a few days, but I have been staying busy with my Pinterest challenge. So, I'm going post all three days worth of attempts. Starting with some Homemade Lavender Orange All-Purpose Cleaner.
DAY 8: Now, this stuff has vinegar as a base. No matter how much orange and lavender you put into this concoction, you can't completely eliminate that vinegar smell. It was certainly a lot tamer than straight vinegar and it certainly cleans things up really well. This recipe takes five to seven days to brew. So I put it all together last weekend. I strained the mixture on Wednesday and added it to a spray bottle. I used it to clean the bathroom and it did a really good job. Definitely a better choice than the bleach cleaners.
After making the cleaner I decided to make some Peanut Butter No Bake Crispy Clusters. These were super easy to make and tasted really good. Now, I opted to use the corn syrup instead of the maple syrup. I am not a big fan of maple syrup on anything other than my pancakes, eggs, or sausage. You have to be careful to simmer the mixture or else you will have a hard taffy-like coating on these suckers. If you simmer it correctly they come out tasting similar to caramel. They are excellent!! I used Chocolate Toast Crunch for half the batch and Rice Krispies for the rest. Good stuff!!


 DAY 9: For day 9, I went with the Double Crunch Honey Garlic Chicken Breasts. The first image is the dredge that is used to coat the chicken. This had a lot of different herbs. As the instructions stated, this makes a large amount of coating. So, I split the mixture in half and placed the excess half into the freezer for a later batch (which I will certainly be making). My husband and I both agree the final product was reminiscent of General Tso's chicken with a kick. It was really good! Kind of sweet with a little bit of heat. The honey garlic sauce was amazing and added a little sweetness to the overall flavor. With this many herbs on board, it helps to balance out the flavor. Definitely a good recipe!
After dinner I decided to decorate the grapevine wreath I purchased at a garage sale for fifty cents. I purchased a roll of burlap from the craft store and made a few of the Burlap Flower Rosettes. I really sucked at making these my first few attempts, but I eventually got it. They turned out pretty nice (thank goodness I found a hot glue gun at that garage sale too). Once I get a few more things for my wreath, I'll add a final pic of it.
 DAY 10: For today's project I went with a few easy ones. As you can see I tried the Jolly Rancher Suckers. These were super easy and relatively cheap. I did as the instructions stated. I placed them in the oven on a cookie sheet with some parchment paper at 200 degrees for five minutes. However, this is where the Pinterest instructions failed. After the first five minutes, pull the tray out and use a sucker stick (which you can buy at Walmart in the craft department) to press down into the softened Jolly Ranchers.
 Then, place them back in the oven for three to five more minutes. After this additional time is up, pull them out and press down on the sucker stick to flatten the Jolly Ranchers even more. As you are pushing the stick down, slowly begin to twist the stick. This will help coat it in the softened Jolly Rancher. Then, let the suckers cool for about thirty minutes. The boys loved them. It was interesting mixing the flavors. I made Myles an apple-cinnamon one and he loved it! These are a win in my book!
 After a batch of suckers were done, I decided to make dinner. I made the Sausage and Cheesy Potatoes recipe. I couldn't find the steakhouse seasoned potatoes like the recipe called for, so I used some plain home fries and added a little salt, pepper, and hickory smoke salt to the mix. This was a fast, easy, and really delicious meal. The serving dish was empty after it was all said and done.
 Since my husband has joined the magical land of Pinterest, I found some green Solo-type cups at the store for only a dollar (they are the reusable type) for him to decorate Minecraft style for the boys. Since they are both Minecraft nerds I found some neat Pins to try in their rooms. Including one that called for decorating green cups with the Creeper face. My husband did them free-hand, because he's awesome like that. Had I tried to do this it would have resembled a black hole with some weird squiggly lines, not pretty! I'm not an artist by any means. The boys thought these were the coolest thing ever. I'm not sure if the Sharpie will wash off, but if it does I know my husband will be able to reproduce the Creeper on these cups for my little men.

 To finish the evening off, I decided to make some Chocolate Swirl Banana Bread. This recipe was super easy and smelled wonderful cooking. It hasn't cooled completely, so I haven't been able to get the family's reviews of how it tastes yet. However, since I have a problem waiting I tried a little piece and it was probably the best tasting banana bread I've ever had. The chocolate made it so much better! Chocolate makes everything better though. I think my days of boxed banana bread mix are something of the past. This stuff is amazing. You simply must try it.
Well, I think that's it for today. I'm not sure what I'm doing tomorrow. I have a few things in mind, but it all depends on the weather. Oh, and if my dog can keep his mouth off of my spray paint. Yes, my dog was a bit curious about the spray paint can I left sitting on the grill and he decided to be a putz and knock it down when I wasn't looking. All I heard was a loud hissing sound and I saw my dog take off running. Needless to say, I was only able to start one tiny part of my project that day. Another trip to Lowe's I guess. Silly dog.
Thanks for reading and I'll see you again tomorrow.
Take care!
NB
DAY 8: Now, this stuff has vinegar as a base. No matter how much orange and lavender you put into this concoction, you can't completely eliminate that vinegar smell. It was certainly a lot tamer than straight vinegar and it certainly cleans things up really well. This recipe takes five to seven days to brew. So I put it all together last weekend. I strained the mixture on Wednesday and added it to a spray bottle. I used it to clean the bathroom and it did a really good job. Definitely a better choice than the bleach cleaners.
After making the cleaner I decided to make some Peanut Butter No Bake Crispy Clusters. These were super easy to make and tasted really good. Now, I opted to use the corn syrup instead of the maple syrup. I am not a big fan of maple syrup on anything other than my pancakes, eggs, or sausage. You have to be careful to simmer the mixture or else you will have a hard taffy-like coating on these suckers. If you simmer it correctly they come out tasting similar to caramel. They are excellent!! I used Chocolate Toast Crunch for half the batch and Rice Krispies for the rest. Good stuff!!
DAY 9: For day 9, I went with the Double Crunch Honey Garlic Chicken Breasts. The first image is the dredge that is used to coat the chicken. This had a lot of different herbs. As the instructions stated, this makes a large amount of coating. So, I split the mixture in half and placed the excess half into the freezer for a later batch (which I will certainly be making). My husband and I both agree the final product was reminiscent of General Tso's chicken with a kick. It was really good! Kind of sweet with a little bit of heat. The honey garlic sauce was amazing and added a little sweetness to the overall flavor. With this many herbs on board, it helps to balance out the flavor. Definitely a good recipe!After dinner I decided to decorate the grapevine wreath I purchased at a garage sale for fifty cents. I purchased a roll of burlap from the craft store and made a few of the Burlap Flower Rosettes. I really sucked at making these my first few attempts, but I eventually got it. They turned out pretty nice (thank goodness I found a hot glue gun at that garage sale too). Once I get a few more things for my wreath, I'll add a final pic of it.
Since my husband has joined the magical land of Pinterest, I found some green Solo-type cups at the store for only a dollar (they are the reusable type) for him to decorate Minecraft style for the boys. Since they are both Minecraft nerds I found some neat Pins to try in their rooms. Including one that called for decorating green cups with the Creeper face. My husband did them free-hand, because he's awesome like that. Had I tried to do this it would have resembled a black hole with some weird squiggly lines, not pretty! I'm not an artist by any means. The boys thought these were the coolest thing ever. I'm not sure if the Sharpie will wash off, but if it does I know my husband will be able to reproduce the Creeper on these cups for my little men. To finish the evening off, I decided to make some Chocolate Swirl Banana Bread. This recipe was super easy and smelled wonderful cooking. It hasn't cooled completely, so I haven't been able to get the family's reviews of how it tastes yet. However, since I have a problem waiting I tried a little piece and it was probably the best tasting banana bread I've ever had. The chocolate made it so much better! Chocolate makes everything better though. I think my days of boxed banana bread mix are something of the past. This stuff is amazing. You simply must try it.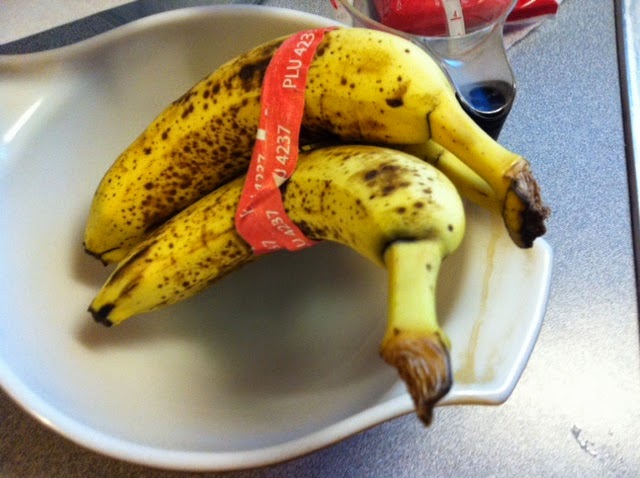 |
| Older, spotted bananas are cheaper to purchase if you don't have any on hand. |
 |
| Getting the swirl on! |
Thanks for reading and I'll see you again tomorrow.
Take care!
NB
Saturday, April 19, 2014
100 Days of Pinterest: Day 4 - Strawberry-Banana Roll-up
If there is one perk to this 100 days of Pinterest challenge, it's the fact that we are eating a lot of different things. Last night's homemade potato chips and the apple pork roast turned out fabulous. I'll be making both again in the future.
Today was a pretty great day in our house. My husband started a Pinterest account. I don't think a lot of men know how great Pinterest is. There are so many DIY posts that can be handy little weapons in the hands of the right men (women have known this forever, we're smart like that). Once I started showing my husband all of the cool things that can be done with skids and ideas we can use to remodel parts of our home he was hooked. I can't wait to see what sorts of things he finds to create.
I took it easy today, because my MS is flaring up a bit. When I was in the shower this morning I got a really bad pain in my right eye, followed by some color loss. I could see perfectly out of my left eye and everything I looked at from my right eye looked dull and really weird. As the day progressed, it slowly got better. Now, I only have a little bit of a difference. It was pretty scary for me, because I've never experienced vision problems with my MS.
 Enough of my MS woes, lets get back to my Pinterest challenge. This morning I made all of us these incredible strawberry, banana, peanut butter, granola, and strawberry preserves roll-ups using Flatout wraps. All of my guys thought they were great and really filling. They were easy to make too. As you can see in the pictures they look like a peanut butter fruit pizza before they're rolled. I rolled them from the strawberry side over and they stayed shut perfectly. Instead of buying a big ol' box of granola, I purchased the store brand of crunchy granola bars (similar to the Nature Valley type) and crushed them in the wrapper before I opened it. I lightly coated the wrap in peanut butter, put some strawberry preserves on the right side topped with the strawberry slices, sprinkled some granola on the strawberries, and then added the bananas to the other side. Then I rolled them up and cut them for easy handling. Easy peasy!
Not sure what I have in store for tomorrow, but I'm sure I'll have fun trying it. I'm thinking I may be making some coconut oil lotion. Hopefully it works! Don't forget to head over to Pinterest and follow me (click here). You can find me on Facebook too.
Take care!
NB
Today was a pretty great day in our house. My husband started a Pinterest account. I don't think a lot of men know how great Pinterest is. There are so many DIY posts that can be handy little weapons in the hands of the right men (women have known this forever, we're smart like that). Once I started showing my husband all of the cool things that can be done with skids and ideas we can use to remodel parts of our home he was hooked. I can't wait to see what sorts of things he finds to create.
I took it easy today, because my MS is flaring up a bit. When I was in the shower this morning I got a really bad pain in my right eye, followed by some color loss. I could see perfectly out of my left eye and everything I looked at from my right eye looked dull and really weird. As the day progressed, it slowly got better. Now, I only have a little bit of a difference. It was pretty scary for me, because I've never experienced vision problems with my MS.
Enough of my MS woes, lets get back to my Pinterest challenge. This morning I made all of us these incredible strawberry, banana, peanut butter, granola, and strawberry preserves roll-ups using Flatout wraps. All of my guys thought they were great and really filling. They were easy to make too. As you can see in the pictures they look like a peanut butter fruit pizza before they're rolled. I rolled them from the strawberry side over and they stayed shut perfectly. Instead of buying a big ol' box of granola, I purchased the store brand of crunchy granola bars (similar to the Nature Valley type) and crushed them in the wrapper before I opened it. I lightly coated the wrap in peanut butter, put some strawberry preserves on the right side topped with the strawberry slices, sprinkled some granola on the strawberries, and then added the bananas to the other side. Then I rolled them up and cut them for easy handling. Easy peasy!
Not sure what I have in store for tomorrow, but I'm sure I'll have fun trying it. I'm thinking I may be making some coconut oil lotion. Hopefully it works! Don't forget to head over to Pinterest and follow me (click here). You can find me on Facebook too.
Take care!
NB
Subscribe to:
Posts (Atom)